
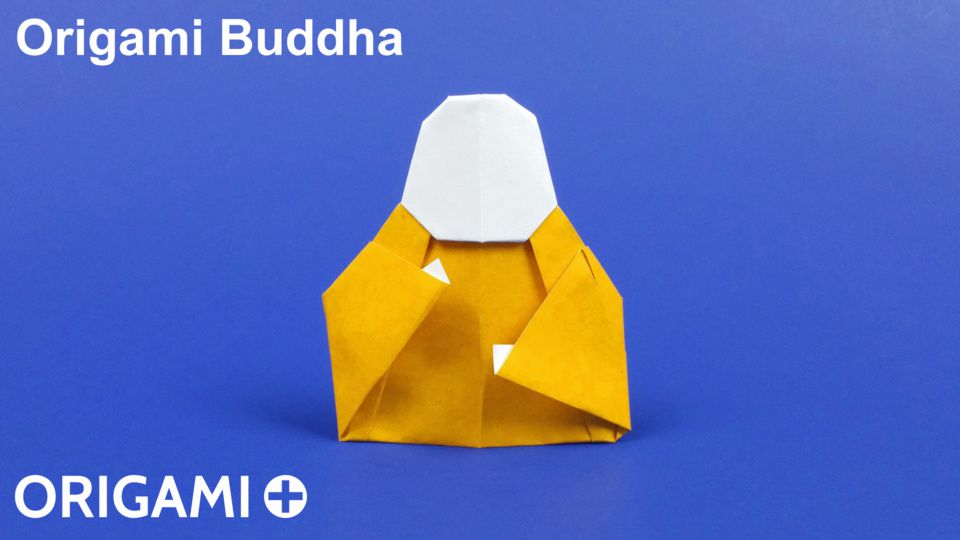
Learn how to make an easy origami Buddha by folding one square sheet of paper with the simple step by step instructions of this origami tutorial. The origami Buddha is sitted and you can choose the positions of his hands. You can make a flat 2D origami Buddha, or make a slighty 3D paper Buddha statue so that it can stand (or more accurately, sit).
I like to create origami models because I never know where the creative paths will lead me. I was invited a few months ago to organize an origami workshop during a Badminton tournament, and so I created a simple origami shuttlecock (the "ball" for badminton). But as I was playing with the paper shuttlecock, I started to see a Buddha! So I continued in that direction, I tried many different ways to make the robe, arms and hands of the Buddha, and here is the final model.
The model is not exactly final in fact: there isn't a precise location for some of the folds, so you can make your own personal Buddha statue.
And in origami, we know the beginning: a square flat sheet of paper, but we never know if the end is really the end. I played a bit more with this model, and I ended up with an origami penguin wearing a suit and a bow tie! I show it in the video, and I will show you how to fold it in the next video.
To make the origami Buddha, you need 1 square piece of paper, with a different color on each side (e.g. "kami" origami paper with a colored side and a white side), so that you can have different colors for the face and hands, and for the robe / clothes.
In the video, I use a 15x15 cm square of paper (about 6x6 inches).
To make a Buddha in origami, please follow the instructions from this video on YouTube:

Here are the step-by-step instructions to fold a Buddha (photo diagram and/or video).
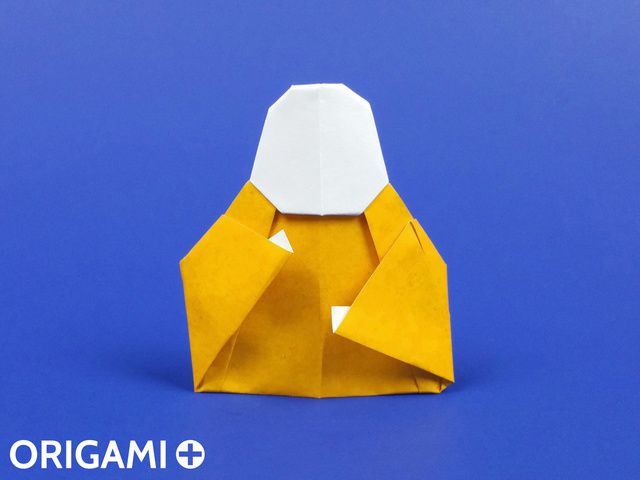
1. Origami Buddha.
I hope you like this easy origami Buddha.
If you fold the paper Buddha, or any of my origami model, please send me some pictures so that I can show them in future videos !
Don’t forget to subscribe to be notified when I publish new origami videos !
It also encourage me a lot to create more fun and easy origami models and tutorials.
Thank you very much, and happy folding !
If you fold this Buddha, please send me pictures of your paper Buddha so that I can show them here.
Have you tried this this Buddha origami model? How did it turn out? Please tell me, and send me a picture of your model so that I can add it on this page!
If you like this Buddha and my other origami models, you can support me on Patreon. Thank you!
Origami is the art of folding paper to create animals, plants, objects and geometric forms.
Origami models with easy to follow step-by-step instructions in video and photos.
Diagrams to fold origami models can be difficult to interpret sometimes. For each model we show a photo of each step so that you can easily fold all models. Each origami model also has a video that shows how to fold it.
Subscribe to the Origami + YouTube channel to be notified when I publish new origami models and videos. If you like my original origami models and videos, please support me on Patreon. Thank you!
Join me on the Origami + Facebook page and follow @Origami_Plus on Twitter to talk about origami, share your origamis and suggest new models!
Copyright © 2015-2022 Stéphane Gigandet
Legal -
Contact -
Origami Links
For even more origami fun:
